So in the past few months LetsEncrypt announced they was going to start offering Wildcard SSL certificates. Now if your not aware of LetsEncrypt their an awesome company looking to make the web a safer place by literally handing out SSL certificates. I am using LetsEncrypt on this site right now.
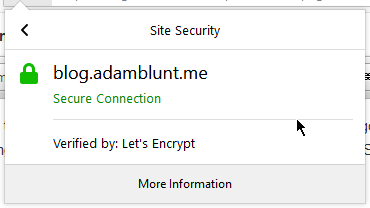
LetsEncrypt SSL certificate being used on this very blog
Now a regular SSL single domain certificate was quite expensive but they have dropped in price quite rapidly from SSL companies trying to still make a profit but a single domain cert is not too helpful as it usually only covers the root domain so adamblunt.me and the www. subdomain so www.adamblunt.me which is not helpful if your like me with tons of subdomains.
Which is where a Multi SAN certificate comes in. this is what LetsEncrypt have been offering for the past 2 years. And clearly the SSL companies are insane if you look at their prices for these certificates they actually cost more than a wildcard certificate but have the advantage of being able to cover multiple domains so adamblunt.me and adamxp12.com in one certificate.
But while that is all fine and dandy as LetsEncrypt already replaces both the standard and multi SAN certificates with their existing offering making it a hard sell for small sites to buy a certificate.
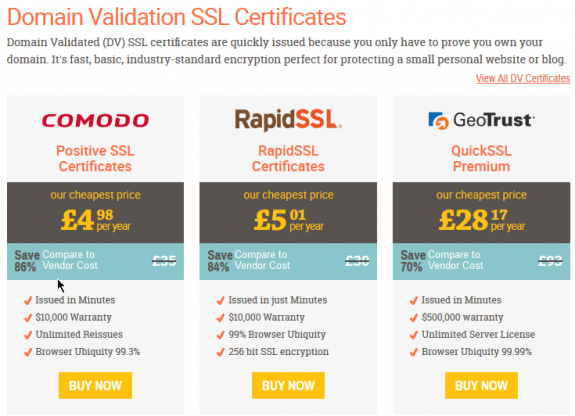
But as of the 13th March 2018 LetsEncrypt are now able to sign wildcard SSL certificates which is a huge deal. Like massive because just look at the regular pricing for a wildcard certificate ON A DISCOUNT SSL website.

Now it's possible to get a 100% free no catch wildcard SSL certificate using LetsEncrypt. This is a huge game changer especilly for nerds like me. I have long wanted a wildcard SSL certificate as I have tons of subdomains and while doing a single Multi subdomain certificate with the old LetsEncrypt sounds fun its not when you need to add a new subdomain.
How can I get one of these certificates?
That is totally easy. I am going to explain how to do it with the Acme.sh client which is my new favorite client as it handles all the boring stuff for you.
First step. Install acme.sh with the following command
curl https://get.acme.sh | sh
Once installed you will need to logout and back in from your SSH/Console session for the command to become available. once you have done so you can start issuing certificates start by reading this page here https://github.com/Neilpang/acme.sh/tree/master/dnsapi That page explains all the DNS providers currently supported. Do the correct export commands for your API credentials so for DigitalOcean I simply provided a read/write key.
Once you have done that you can issue a wildcard certificate with a command like this (note this will be slightly different for each DNS provider)
acme.sh --issue --dns dns_dgon -d adamxp12.com -d *.adamxp12.com
What is happening behind the scenes? simple. achme.sh connects to the DNS provider and adds a TXT record to the domain. it then has LetsEncrypt validate this TXT record and if that succeeds then your granted a shiny new SSL certificate.
Once you have your shiny certificate you will need to install it with a command like this. Note that this command is for Nginx and as such will be different if your using another server. Also note that I am doing a restart vs a reload as I found even with a force-reload is was not taking the new certificates but your mileage may vary.
acme.sh --install-cert -d adamxp12.com \
--key-file       /etc/nginx/certs/adamxp12key.pem  \
--fullchain-file /etc/nginx/certs/adamxp12cert.pem \
--reloadcmd     "systemctl restart nginx"
Now you have installed your certificate you just need to configure your server. Here is a Nginx server block which does HTTP2 and IPv6 with our new SSL certificate
server {
        listen [::]:443 ssl http2;
        listen 443 ssl http2;
        server_name *.adamxp12.com;

        ssl_certificate /etc/nginx/certs/adamxp12wc-crt.pem;
        ssl_certificate_key /etc/nginx/certs/adamxp12wc-key.pem;

        location / {
                add_header X-Firefox-Spdy h2;
                proxy_pass http://127.0.0.1:8080;
                proxy_set_header Host $http_host;
                proxy_set_header X-Real-IP $remote_addr;
                proxy_set_header X-Forwarded-Port 443;
                proxy_set_header X-Forwarded-Proto $scheme;
        }

}
And now we can verify our new certificate is working by browsing to anything.adamxp12.com and seeing not only a green padlock in the address bar but also we can view our new shiny certificate

I am so excited for this new feature of LetsEncrypt and I can't wait to see what uses I can find for the infinite subdomains I can now secure without having to request a new certificate everytime.